


Designing an app is a simple three-step procedure with Builderfly. It lets you create AI-powered native mobile apps that can be published on both Google App Store and Apple App Store. Builderfly is a software-as-a-service platform that includes creating an online store, building powerful mobile application, customizing the mobile apps, adding products, choosing templates, uploading pictures, processing orders, creating pages, offering discount coupons, selling everything online at one platform, getting tips to grow business, and managing the online store. The distinct design editor helps in differentiating the mobile app with the web store. In this ecommerce blog, we will discuss how Artificial Intelligence (AI) helps in designing the ecommerce mobile app at Builderfly platform.
How does AI work in Builderfly Platform?
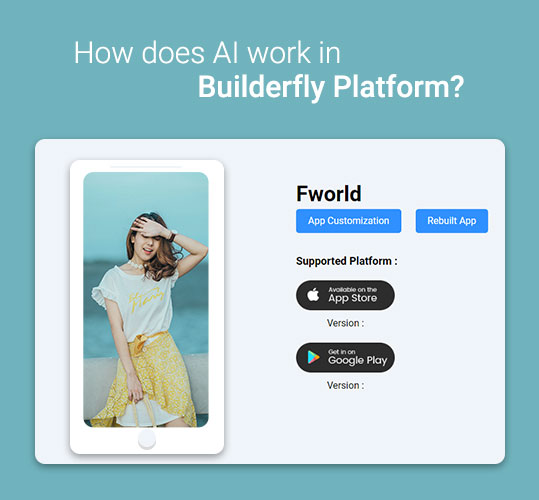
AI is a part of computer science that focuses on instilling human intelligence in machines in order to function and think like a human. In the ecommerce industry, artificial intelligence is used to analyze customer behaviour, provide personalized services, and offer other automated services for creating the best user experience. Builderfly uses this power of AI to create an amazing mobile application along with a powerful mobile editor. The prime advantage of using AI in Builderfly is that you do not need to re-enter any store data from your online store to your mobile application. The use of AI helps in automatically collecting the data from your store without any hassles. Below are the few steps that show the use of AI while creating a mobile app with Builderfly:
- When clicking on the App Front from the dashboard, you get the option to Build a Mobile App. Click on the Get Started button and AI will take over the process.
- The store data including images, category, sub-category, blogs, and videos are analyzed.
- You need to enter the mobile app name. However, this can be changed whenever you wish to change the app name.
- Click on the “Next” button in the right corner of the screen
- Choose an app theme mode from “Light” and “Dark” and click on the “Next” button
- Choose whether you want a Blog section in the app or you can decide it later also.
- Then, decide whether you need an Instagram Gallery in your mobile app. You need to click on “Next” button or “Decide Later”‘ button.
- Select if you want Twitter feed in your ecommerce app. You can decide it later or click on the Next button.
- Select theme for the ecommerce application front and click on the “Next” button. Herein, you get the preview of the app and when you click on Choose More Themes, you get more theme options and get a preview of the same. Select the ‘Menu Style’ from Slide and Tab view as per the preference and click on the ‘Next’ button.
- Create and choose your CMS pages as per your convenience. You can also create new CMS pages if required.
By setting up your logo, welcome, the home page, category, sub-category, product list, and product detail; within a snap of time, your mobile application is ready to use.
How to Customize my Mobile App Created in Builderfly?
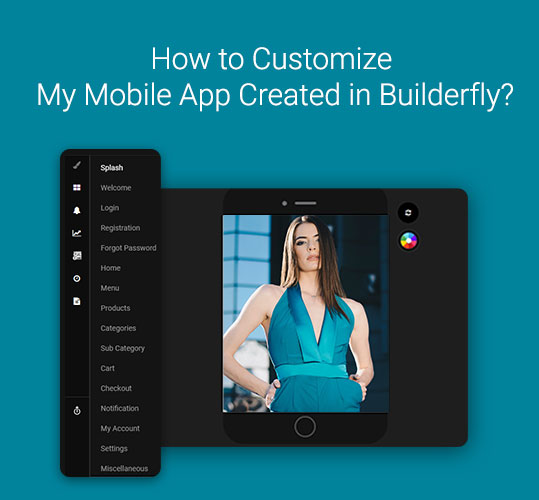
Customizing the mobile app in Builderfly is a quick yet easy process. You can personalize your app using the distinct design editor in the mobile app that helps you differentiate your mobile app from your online store. You can edit and customize your mobile application by clicking on the ‘Edit Your App’ tab. In every screen, the default template is already chosen. However, you can change the template as per your choice. Following are the customization options and its functions:
Navigation Tab
Design
View the design of the mobile application from this section. Below are the designing options offered in Builderfly:
Splash
The Splash Screen is the first screen you see when you visit a mobile application. Under this option, you can decide how your splash screen must appear by choosing the template you require. In the Settings option, you can choose whether to display or hide the background image and splash logo. Also, you can change the background image and the splash logo as per the requirement.
Welcome
The Welcome Screen is the display that welcomes your customers to your mobile app. Here, you can:
- Choose the layout of the welcome screen you like for your mobile application from the ready–to–use templates and click on the ‘Save’ button.
- Upload and modify your welcome screen photo and the text content from the “Settings” tab. You can add any detail at later time too.
Login
It is the screen that is displayed when an already-registered customer wishes to log in to your mobile app. Here, you can:
- Select from the ready–to–use templates for login screen and press on the “Save” button.
- Upload images and edit text from the ‘Settings’ tab and save the changes made. Select the background image by choosing whether to display or hide the background.
Registration
This is the screen that is displayed when a new customer wishes to register with your mobile app. Here, you can:
- Finalize the design template of the “Registration Screen” of your mobile application.
- Choose the background, manage the input setting, and manage the button setting.
- Click on the ‘Save’ button.
Forgot Password
This screen appears when a customer clicks on the Forgot Password link on your mobile app login page. Here, you can:
- Finalize a design template of the “Forgot Password” screen of your mobile app.
- Finalize the input text field you wish to provide your customers for retrieving their password.
Home
The Home Screen is the display of the mobile app where the user can navigate to different app uses as per the requirements. Here, you can:
- Finalize from the range of ready–to–use design templates for your home screen in the mobile application.
- Modify and manage the header title and choose to display or hide the cart in the “Header” section of the app.
- Add, modify or delete the slide to be included in your ecommerce application under the “Slider Block” section.
- Select whether to show or hide the “Best Seller” section in your app store online.
- Select whether you want to display or hide the “New Arrival” section in your ecommerce app.
- Select whether to show or hide the “Recently Viewed” section in your app.
- Decide whether to display or hide the list of “Discounted Products” in home screen of the app.
- Decide whether you wish to have a blog section in the app.
- Decide to show or hide the Instagram handle in the app screen.
- Decide whether to display or hide the Twitter handle.
- Decide whether to display or hide the photo gallery section in the app.
- Add, edit or discard the Video section from your mobile application.
- Add, edit or delete the image text in the app.
- Add or modify static photos for promotional discounts & coupons.
- Add, edit or delete the static image text for promotional discounts & coupons.
Menu
The Menu Screen is the display page that shows up when the user navigates to the menu of your mobile app. Here, you can:
- Select the design layout of your menu from the various templates available to choose. Choose the menu style from the tab and slide view.
- Add/ edit/ remove home tab from menu.
- Add/ edit/ remove categories section from the menu.
- Add/ edit/ remove the product list from the menu.
- Add/ edit/ remove notifications bar from menu provided.
- Select to show or hide the Settings in the menu provided.
- Add/ edit/ remove “My Orders” section from menu created.
- Select to show or hide the “My Account” section in menu.
- Setup your own profile using the “My Profile” section.
- Add/ edit/ remove the option of “Change Password”.
- Select to continue or discard the “Address” bar in the menu.
- Opt whether to show “Wish list” in menu segment.
- Offer coupons from the menu bar.
- Opt to have the ‘Logout’ button in the menu
Products
The Products Screen is displayed when your user navigates to the view the products you sell on your mobile app. There are many sub-categories in the Products section, they are:
List
Here, you can:
- Select the design of your product list screen from several ready–to–use templates.
- Select to show or hide “Filter” option provided.
- Select to show or hide “Sort By” option field provided.
- Choose preview type from list & grid.
Sort
Here, you can:
Select the look & feel of your app’s “Sort Screen”.
Filter
Here, you can:
Select a suitable layout for your app’s “Filter Screen”.
Detail
Here, you can:
- Choose a design template for the app’s “Product Detail Screen”
- Select whether to show or hide the “Wishlist”
- Choose whether to reveal or hide the “Product Description”
- Opt to keep or hide “Share Product” option provided
- Select to show or hide “Compare Product” feature provided
- Opt to display or hide “Review” option
- Choose to exhibit or hide the “Related Products”
- Finally click on the “Save” button
Review List
Here, you can:
Select ready–to–use design templates for home screen of the mobile app.
Categories
The Category Screen is displayed when the user navigates to the product categories you offer in your ecommerce mobile app. Here, you can:
- Select particular template for the “Category Screen” of your store
- Manage and edit the input titles
- Choose to show or hide the ‘Cart’
Sub Category
The Sub Category Screen is displayed under the categories to further differentiate the type of the products sold in your ecommerce mobile app. Here, you can:
Select from various ready–to–use templates for your home screen of mobile app.
Cart
The Cart Screen is displayed when the user visits their cart to view the products they have added in your ecommerce mobile app. Here, you can:
- Choose the template of the ‘Cart Screen’
- Change/ edit the header of the screen
Checkout
The Checkout Screen is the display that is shown when the user wishes to check out from your ecommerce mobile app. There are a few sub-categories under this section, they are:
Payment Screen
Under this option, you can:
Choose the template for Payment Screen and edit the input fields
Confirmation
Under this option, you can:
- Select the Confirmation Screen template
- Edit the header/ title
- Choose to display or hide the Billing Address Edit button and promo code.
Order Status
Under this option, you can:
- Select the template of the ‘Order Status Screen’
- Choose and update the Order Status Screen Icon image
- Choose to display or hide the icon in the Order Status Screen
Order Detail
Under this option, you can:
- Choose the template for the Order Detail Screen
- Change the title/ header for the screen
Add Review
Under this option, you can:
- Choose the template for the Add Review Screen
- Change the title/ header of the screen
Notification
Under this option, you can:
- Select the default Notification template
- Choose to show or hide the ‘Description’ feature in the application
- Opt to display/ hide the ‘Date’ feature in the Notification Screen
My Account
The My Account tab follows a few subcategories, they are:
My Account
Under this option, you can:
- Select the default ‘My Account Screen’ template
- Edit the text input field in the ‘My Account Screen’
My Profile
Under this option, you can:
- Select the default ‘My Profile Screen’ template
- Edit the text input in the ‘My Profile Screen’
Change Password
Under this option, you can:
- Select the default ‘Change Password’ template
- Edit the text input in the ‘Change Password’ screen
Edit Profile
Under this option, you can:
- Select the default ‘Edit Profile’ template
- Edit the text input in the ‘Edit Profile’ screen
Order History
Under this option, you can:
- Select the default ‘Order History’ template
- Edit the text input in the ‘Order History’ screen
- Choose to hide or show the cart feature in the ‘Order History’ screen
Addresses
Under this option, you can:
- Select the default ‘Address’ screen template
- Edit the input fields in the ‘Address’ screen
Add Address
Under this option, you can:
- Select the default ‘Add Address’ screen template
- Edit the input fields in the ‘Add Address’ screen
Wishlist
Under this option, you can:
- Select the default ‘Wishlist’ screen template
- Edit the input fields in the ‘Wishlist’ screen
- Choose to hide/ show the cart feature in the ‘Wishlist’ screen
Settings
Under this option, you can:
- Select the default ‘Settings’ screen template
- Edit the input fields in the ‘Settings’ screen
Miscellaneous
The miscellaneous category includes the following sub-categories:
Under this option, you can:
- Select the default ‘Twitter’ screen template
- Edit the input fields in the ‘Twitter’ screen
Coupons
Under this option, you can:
- Select the default ‘Coupon’ screen template
- Edit the input fields in the ‘Coupon’ screen
Under this option, you can:
- Select the default ‘Instagram’ screen template
- Edit the input fields in the ‘Instagram’ screen
Blog List
Under this option, you can:
- Select the default ‘Blog List’ screen template
- Edit the input fields in the ‘Blog List’ screen
Blog Detail
Under this option, you can:
- Select the default ‘Blog Detail’ screen template
- Edit the input fields in the ‘Blog Detail’ screen
CMS
Under this option, you can:
- Add new CMS
- Enter the title of your new CMS page title
- Click on the ‘Next’ button
App Settings
Under this option, you can:
- Enter the application name
- Add the store logo or use the default logo
- Choose a color from the color pallet
- Add the custom pallet here
- View the details of the chosen pallet color
- Click on the ‘Save’ button to save the changes made
Notification
Under this option, you can:
View and manage the notifications in this category
Analytics
Under this option, you can:
View and manage the analytics report of your business in this category
Analytics Configuration
Under this option, you can:
Integrate external analytics to your Builderfly store such as Google Analytics and Flurry Analytics.
Build History
Under this option, you can:
View and manage the ‘Build History’ of your store in the mobile application
Log History
Under this option, you can:
View the history of your logs from this section.
Logout
Under this option, you can:
Log out from your App Builder with a few clicks.
Now that you know all the details to design your mobile app with Builderfly, why wait? Get started right away!